Why it matters
Every part that enters the shop has to be logged against a Sale Order before production touches it. The receiving record is the system's proof that "these 80 clevis pins arrived on this date in this condition from this customer for this PO" — and it feeds the shop floor the trigger to start work.
Step 1: Open the Receiving list
Menu: Plating → Receiving → All Receiving.
Two things to know:
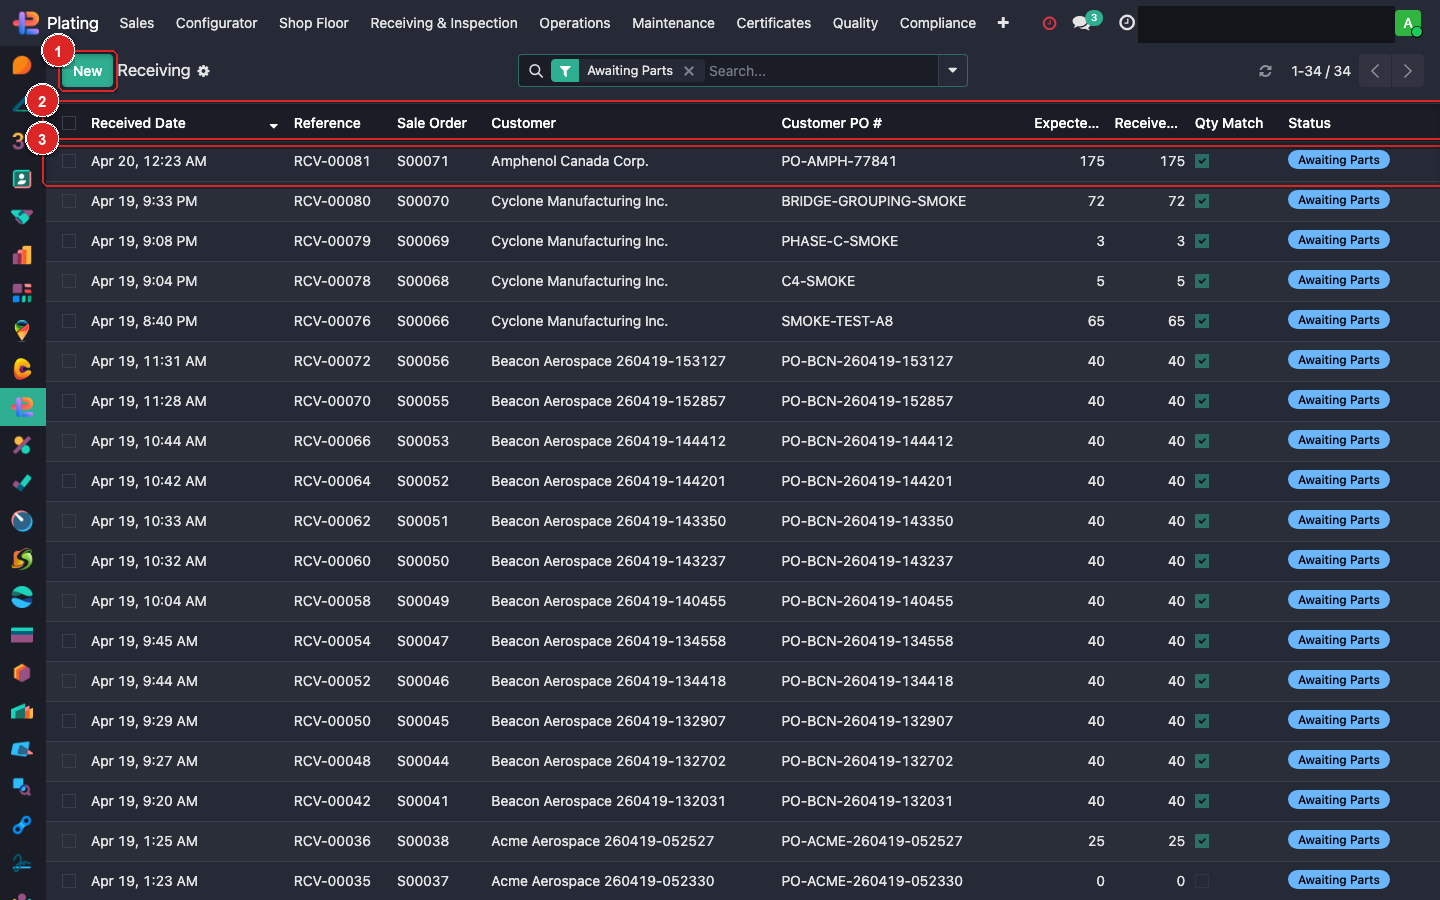
- Box ① — + New button. This opens a blank receiving record.
- Box ② — the column list. Key columns:
- Reference — the system-generated receiver number (e.g.
RCV-00081). - Sale Order — the SO the parts are being received against.
- Customer PO # — from the SO.
- Customer — clickable.
- Expected / Received Qty — parts you were supposed to get vs. parts you actually got.
- Qty Match — green checkmark if the two agree, red if they don't.
- Reference — the system-generated receiver number (e.g.
Filter by Pending Inspection to see what still needs QC sign-off, or by Discrepancies to see the records where counts or condition didn't pass.
Step 2: Start a new receiver
Click + New. The receiving form opens.
Reading the form top to bottom:
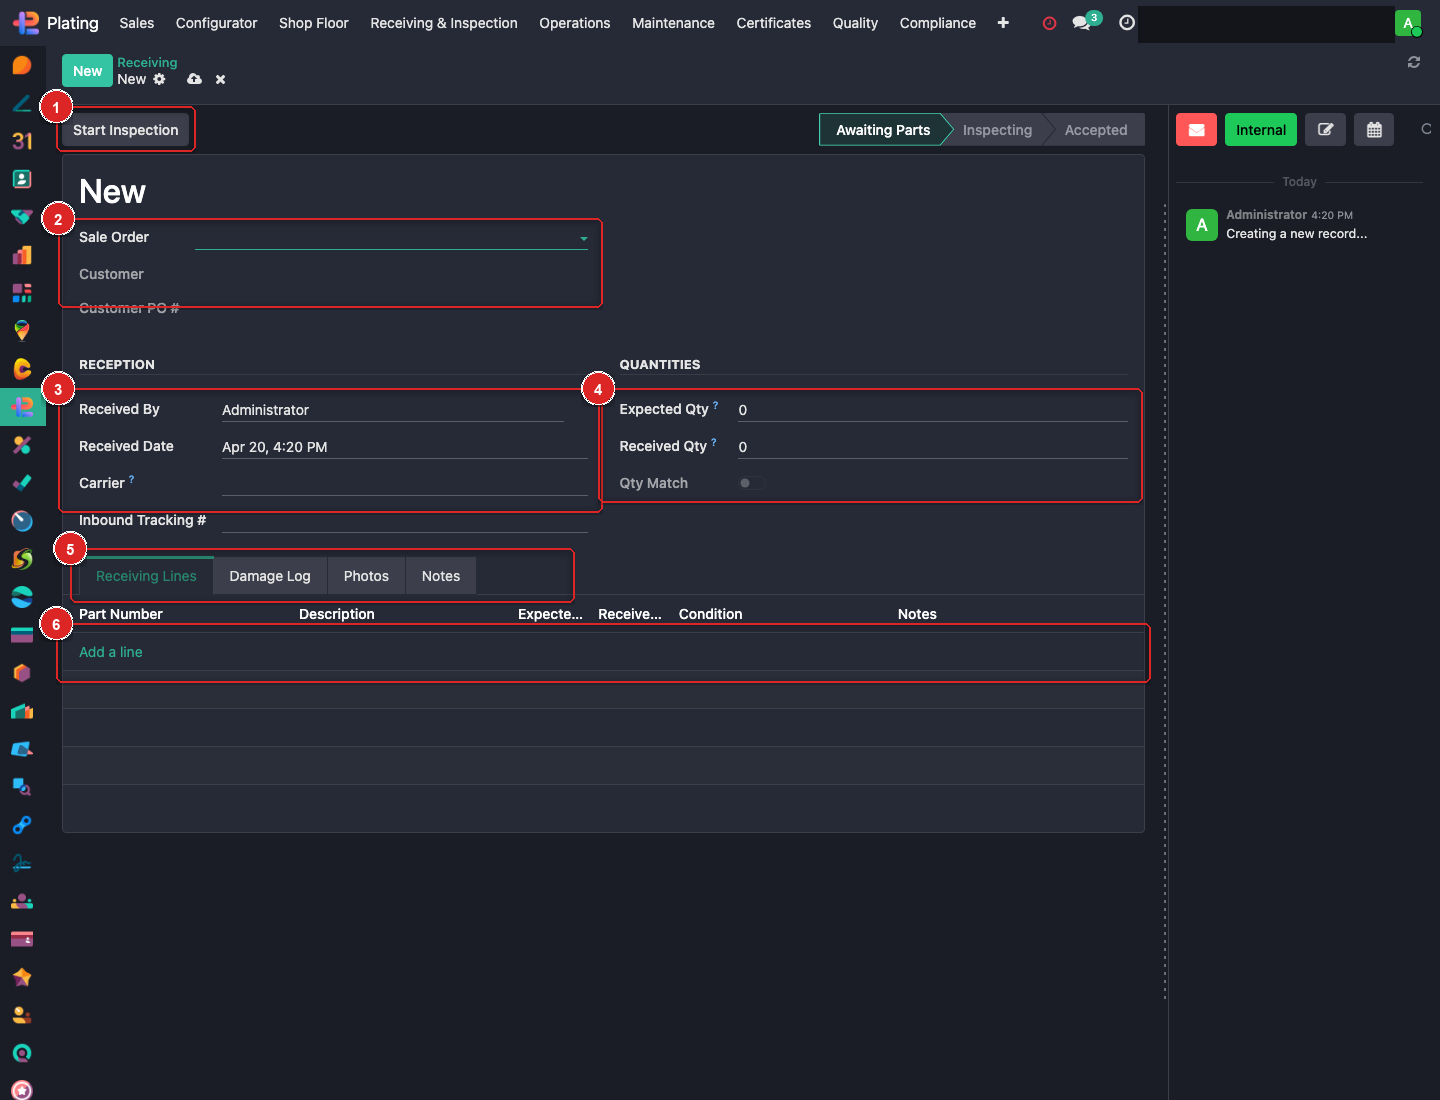
- Box ① — Start Inspection button. Don't click this until you've filled everything else.
- Box ② — status progress bar: Awaiting Parts → Inspecting → Accepted. Shows where the record is in its lifecycle.
- Box ③ — Sale Order + Customer + Customer PO #. Always fill Sale Order first; customer and PO auto-populate.
- Box ④ — Reception block (Received By / Date / Carrier / Inbound Tracking #).
- Box ⑤ — Quantities block (Expected Qty / Received Qty / Qty Match).
- Box ⑥ — tabs: Receiving Lines / Damage Log / Photos / Notes.
- Box ⑦ — line table where each line is one part number from the SO.
Step 3: Match the receiver to a Sale Order (box ③)
Start typing the Sale Order number or the Customer PO #. The dropdown auto-filters. Pick the SO.
The moment you pick an SO:
- Customer auto-fills.
- Customer PO # auto-fills.
- The Receiving Lines tab (box ⑦) pre-populates with one line per part on the SO, each with Expected Qty set from the SO line's quantity.
If you can't find the SO — the customer sent parts without an SO on file — stop and go confirm an SO first. Don't create a receiver orphan without a SO; the system won't know where to route the parts.
Step 4: Reception details (box ④)
| Field | What to enter |
|---|---|
| Received By | You (auto-filled from the logged-in user). |
| Received Date | Now (auto-filled). Change only if logging something after the fact. |
| Carrier | Who delivered — Purolator, FedEx, customer drop-off, etc. Free-text. |
| Inbound Tracking # | From the carrier's shipping label. Leave blank for customer drop-offs. |
Step 5: Count and inspect each part (box ⑦)
Each line already has Expected Qty filled in. Walk up to the skid, count, and fill:
- Received Qty — what you actually counted.
- Condition — pick from: OK / Minor Damage / Major Damage / Wrong Part / Mixed.
- Notes — anything specific ("5 pcs had rust in the threads" / "wrapped in greasy paper" / "box was wet").
Use + Add a line only if the customer sent parts that aren't on the SO — but 99% of the time the lines auto-populate and you just count.
As you fill received-qty values, the Quantities block (box ⑤) updates automatically:
- Received Qty total goes up
- Qty Match flips to green when Expected == Received
Step 6: Damage Log tab (if damage exists)
If any line's Condition was "Minor Damage" or worse, open the Damage Log tab and document:
- What's damaged (which pieces, approx quantity)
- Photos (drag and drop into the Photos tab)
- Did you notify the customer? (free-text)
A damage log entry is what the customer sees if they ever dispute the return condition. Don't skip it.
Step 7: Start Inspection (box ①)
Click Start Inspection. The record transitions to Inspecting state (box ②). This tells QA the parts are ready for their review.
What happens behind the scenes:
- The linked Sale Order's Receiving Status flips from "Not Received" to "Partial" or "Received" (depending on whether all lines have full counts).
- An auto-email fires to the customer confirming receipt (via the FP: Parts Received template).
- A QC-hold task is created if any line had damage.
Step 8: QA accepts (or rejects)
Quality walks up, confirms the counts, signs off. They click Accept Parts on the same form. State moves to Accepted. Production can now pick up the work.
If QA rejects (major damage, wrong parts, something unfixable): click Reject Parts instead. The SO is flagged, production is blocked, and the notification trail alerts the customer.
Step 9: Print batch labels (optional)
Once accepted, print physical labels so the parts stay identifiable on the shop floor:
- Use the Print → Receiving Labels menu on the form.
- A PDF of labels prints (one per line) — QR code, part number, customer, SO#, receiving date.
- Peel and stick to the skid / box / rack.
What can go wrong
I can't find the Sale Order
The SO isn't confirmed yet. Go confirm it (Plating → Sales → Sale Orders → open it → Confirm). Then come back.
Received quantity is different from Expected
That's what the Qty Match column is for — leave the actual count, don't fake it. If the customer shorted you, write a note and escalate to the estimator. The system will flag the SO for review.
I accidentally hit "Start Inspection" before finishing
Open the record, add whatever's missing, save. You can still edit lines after inspection starts — the "Inspecting" state just means QA can see it.
The parts came without paperwork
Treat the carrier's waybill number as the tracking reference and check the address label for a customer name. Call the customer. Don't guess which SO it's for — wrong SO assignments cause rework nightmares downstream.